- Reboot the Windows Vista and boot up with Windows Vista installation DVD.

- While the Windows Vista installation interface pops up, click the Repair You Computer link at the bottom-left corner.
- Next, the System Recovery Options dialog box appears. There are few options that related to repairing Windows Vista, looks like Recovery Console in Windows XP:
Startup Repair options is used to automatically fix problems that are preventing Windows Vista from starting.
System Restore to restore Windows Vista setting to an earlier point in time.
Windows Complete PC Restore to restore Windows Vista from a full system backup.
Windows Memory Diagnostic Tool could be the first Microsoft memory tester toolkit that bundled with Windows setup media.
Command Prompt is the target option of this Vista hacking guide. Click on this option now. - In the Vista Command Prompt, type
mmc.exeand press ENTER key to bring up the Microsoft Management Console. - Click on the File menu, select Add / Remove Snap-in option, locate and select the Local Users and Groups on the left panel, and click Add button to add it to the right panel.
- Now, the Choose Target Machine dialog box pop up. Keep the default setting by clicking the Finish button – that means using the Local Users and Groups snap-in to manage this local computer, and not another computer in network.
- Click OK button and return to MMC windows. Under the Root Console in left panel, double-click Local Users and Group that was added earlier. Click on User folder, locate and right-click the target Vista logon account that found in the right panel.

Remote Desktop Protocol: RDP is a protocol developed by Microsoft, to provide a user with a graphical interface to another computer. It is one type of application sharing protocol. In widows Xp and windows vista, RDP is pre-installed as Remote desktop connection.
Microsoft RDP includes the following features:
- Encryption
- Bandwidth reduction features
- Roaming disconnect
- Clipboard mapping
- Print redirection
- Virtual channels
- Remote control
- Network load balancing
The default port used for remote desktop protocol is port 3389. Now, if you are trying to use the Remote desktop feature of windows and are hosting your remote desktop pc from behind a router, you will require opening a port in your router for forwarding. Otherwise you can not remotely access your pc from another pc from the internet.
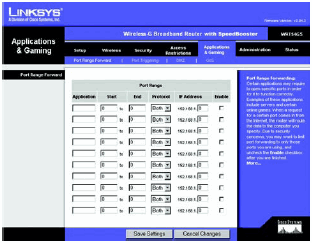
So what you can do is open the router configuration page. Specify another external port number and then point that port to the 3398(Default port for RDP) on the IP address of the computer that you wanted to access.
Another workaround is to change the listening port for remote desktop.
How to change the listening port for Remote Desktop
Following is the list of steps to follow to change (remote desktop protocol) RDP port:
This list includes steps that tell you to modify registry, but serious problem may occur if you do not modify registry correctly. For novice user it is better to take backup of the registry before applying following changes.
- Start Registry Editor. ( Use windows Run : type command ‘regedit’)
- Locate and then click the following registry subkey:
HKEY_LOCAL_MACHINE\System\CurrentControlSet\Control\TerminalServer\WinStations\RDP-Tcp\PortNumber
- From the edit menu, click on the modify link and then select decimal type for value.
- You can enter here the new port number and then click OK.
- Exit the Registry Editor.
Note: After going through the above list of steps, when you try to connect to this computer by using Remote Desktop Connection, you must enter the new port.
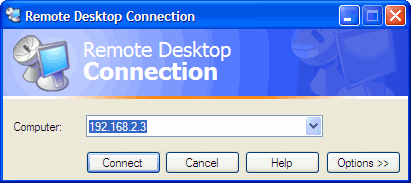
The main reason behind changing the RDP listening port is security. Since everyone knows that 3389 is default port for RDP. So anonymous user can check that port to find if you have Remote desktop enabled and can potentially attack on your network.


